Showing posts with label Organization. Show all posts

Monday, September 24, 2012

Volunteers are WONDROUS!

Can I just say I am thrilled by all the wonderful volunteers I have in my class this year. It's wonderful to see students' families engaged in the classroom AND it is such a help. Some family members volunteer during the day and com ein during math time. This lets me have another adult in the classroom working with students when I am conducting math small groups. I LOVE this time ~ SOOOO beneficial. I also have several families that will cut lamination or prep activities at their home and send them back in. When I send things home to volunteers I have a little system to keep it all organized. I thought I would share it with you all. . . 

The paper I send home in the big baggy explaining what needs to be done. 


The small baggy with examples of how I want things cut. 

The final product before it gets sent home. 
You want to know what is AWESOME about this. All the families brought the bags back to me in less than a week (most brought it back the next day!!!). 

Now how I organize my Copy volunteer system. First off, I keep it all in a copy folder that says COPY ~ Miss Kielar (PICTURE to come). Then I simply paperclip one of the squares from the following form on to each item or set of papers I need copied. I can put the total amount I need copied. I check if I want it 1 sided to 2 sided, 2 sided to 2 sided, 2 sided to 2 sheets, or leave it blank if I just want it normal. Next, I can say to paperclip or staple. I also have a spot for sorting papers or stacking papers. I enjoy colored paper and card stock paper at times so there is a spot for that as well. I love this system. It is so simple to manage. 

There are 6 slips to a paper. 
Here is a close up!
You can grab these forms as FREEBIES at my TPT store HERE!

Friday, July 6, 2012

A Teacher's Wisdom LINKY

I'm linking up with Deb from Fabulously First
Fabulously First


I want to start this post off by saying I'm going into my second year of teaching (and am no where close  to having it all together). I remember people telling me my first year would be the hardest. I would respond politely and think in my head. . . I just spent four years preparing for this I know it won't be a walk in the park but the hardest? PLEASE listen to them . Your first year will be the hardest. In my personal opinion if you get through your first year and still LOVE what you do you are CERTAINLY in the right profession. Let me also say I LOVE what I do. 

I started off the year with a mentor teacher. Now I am spoiled because my mentor teacher has taught second grade for 30 years. I learn so much from her and would still be lost without her. I also love that we get all so good. Having her was HUGE. I mean I would go into her classroom just about everyday. (It's right across the hall.). She was/is so patient with me and all the questions I have. If you can, find an older, experienced, mentor teacher who is willing to share their knowledge with you. It is very helpful if they teach the same grade as you, even the same curriculum. Those first couple months I basically did whatever she did. It let me explore my teaching style and classroom management with the assurance that I was covering the standards. A note of encouragement the actually teaching part tends to be the easiest. The parents, paperwork, and miscellaneous stuff is the hardest. 

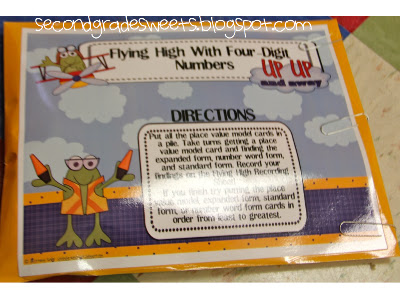
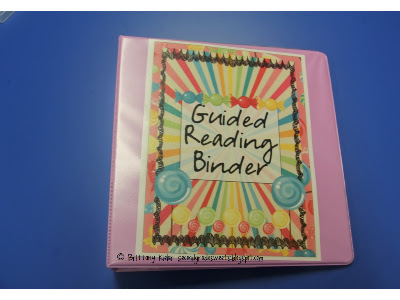
The next biggest thing that helped me my first year was getting my act together and seriously organizing my classroom. It's still a work in progress and it will always be. That said, organize your room and LABEL everything. If you need a sub (and you will) everything is labeled and easy to find. Your students (remember it's their room to) will be able to find things easily. You will be able to find things easily. Finding things easily means you aren't wasting time finding things you placed in a pile on that table yesterday but can't seem to find anymore. See what I've done in my room HERE and HERE and HERE and HERE!

One more thing I just can't help but saying. Take the time in the first couple weeks to REALLY establish classroom rules, routines, and procedures. It is WORTH it. 

All that in mind remember to LOVE what you do. Get to know your students and let them know you love them to. Here is another hint, when parents see you love their children they will love you! It works like a charm. When I allowed the parents to see me love and care for their child (and not be concerned about them judging me or thinking I'm childish) the response was amazing. 

Now I need to go and read everyone's wisdom. I still need it ALL!

I have some freebies up my sleeve and I need to accept all the amazing awards I've been receiving. This week I was at my home in the Keys with my family. Next week I'm on my way to Debbie Diller's Summer Institute and am SUPER DUPER EXCITED! 


Thursday, June 7, 2012

Filing Cabinet Organization & Book Study


It's officially summer time and I haven't a clue how I'm going to use up all my time. There is the obvious: blogging, reading, creating, crafting, traveling, and baking. I know it sounds like a lot but I don't think time wise it will take a lot. Well a birdie told me I'm staying in second grade! This makes me very happy. I love my team teacher, I love second graders, and feel like I may have a clue what I'm doing next year since I've already done it once :) YAY!


Now, I am going to give you a peek into my filing cabinets. When I first moved into my classroom I had two filing cabinets JAM packed with stuff. Guess what? None of it was mine. It took me forever to go through it all and decide how I wanted to organize paperwork and use my filing cabinets. Well the verdict? I strongly dislike filing papers into a filing cabinet. Rifling through manilla folders all bent up is not fun when you can't find the one paper you need. However, going to the correct tab in your three ring binder and flipping through the pages like a book is an easy peasy delight. (i'm not sure peasy is a word - you get my gist). That will be another post for another time. So after contemplating and c contemplating I decided to dedicate one entire filing cabinet to math. Math stations, math literature, math posters/charts, etc. How did I organize all the math stuff? I created file tab dividers for every topic (enVision Math's version of chapters) and every SINGLE lesson. I printed my labels cut them up and put them in file tab dividers and into the correct file folder. This has revolutionized my organization, accessing my resources, and seeing where I could use some resources.  In my other filing cabinet I have one drawer dedicated to my student files. Any important papers or items helpful for parent conferences etc go into the students numbered folder. Another drawer is my Language drawer. It is organized just like my math drawers. I created labels to go with every language concept we teach in the order we teach it. All my language stations, chart, craftivities, etc. go in the appropriate folder. Having every file labeled with the skill makes it easy to file things quickly as well. Then for my last 2 drawers I have my spelling units organized just like math and language. I also typed up a word list for every chapter and printed them on color card stock and laminated them. This is very helpful for spelling stations and practicing. Here are some pictures I have. The captions give you an annotated version.


The first tab in the orange file folder reads: Topic 2 Subtraction Strategies. I know it's a little blurry and I'm not sure why. Anyway every topic/chapter is in an orange folder for math (all the coordinating lessons that go with that topic are in green folders). In the orange topic folder is any general games, math literature, math mats, etc that go with that topics content.

You can see that my filing cabinet has lots of READABLE tabs. No chicken scratch in a rush handwritten tabs. I personally find it to be so so so much easier to type it up print, cut, fold, insert into tab, and then insert tab into file folder. 

This is my bottom drawer. Every drawer holds about 4 topics. I also love this system because it lets me see where I am lacking in materials. The bottom drawer is not nearly as full as my top drawer :( Also, remember I do not keep worksheets, tests, practice pages, etc. in my filing cabinet. I keep them in binders. (Future Post)
Again, another topic folder tab in orange. You can see all the green folders with their own labeled tabs. 
This is the tab behind the above orange tab. It is labeled: 14.1 Building Numbers in the 1,000s 
This is one of the items you would find under the above tab: 14.1 Building Numbers in 1,000s
Inside this envelope is the accompanying anchor chart to help teach this skill that coincides with the math station game. I actually use this as a whole group lesson when I introduce this concept and then I let them do it in stations later. It's always a hit. Games make learning fun!

Also, check out Primarily Inspired. . . she is putting together an awesome book study on Guided Math. Guess what? I'm hosting chapter 4. You must check it out. I almost finished the first chapter and am in nerdy teacher love.

Saturday, May 26, 2012

Oh My! I'm at Ninety-Nine!

WOW ~ I have 99 followers. I know, I know, to some of you other bloggers that is nothing but to me it is something. I have 3 and a half days of school left. I can;t believe it is almost over. I have such a big to do list during this summer. Now that I've taught for a year I know what I want next year and what I don't to a certain extent. I know I will always learn more every year and, in turn, be more prepared for the next school year. Today I worked on my report cards! All that's left is comments but I don't think we have access to it yet. :)

I don't know about you but I like using fadeless (and flameless) paper in my classroom. I've discovered the practicality of keeping the same bulletin board paper and borders up all year. All I do is simply change out the content. I use to use staples a lot, next year I'm going to be all about the clothespins. It will be SO much easier to attach ever-changing bulletin board content when all I have to do is clip and unclip! Back on track - As much as I love keeping my bulletin board paper and borders the same all year I have a decent size collection of themed borders. I can't simply part with them. . . . SO. . . the solution. . . Poster board trimmed with themed border (laminated of course)! I had a huge box of posters in my classroom when I inherited it so I took the box home and chose colors to match the borders and themes. I have made about 10 so far and am loving it. What will I use it for you may wonder? First, they are laminated so my students can write on them with expos. I foresee many tree maps, venn diagrams, list, and other graphic organizers. I also create some units with pocket chart pieces that I will use on the themed poster boards as well. I will even attach some pocket charts onto them. Now onto a couple pictures. These ones are bee themed because we have been learning about bees. A bee keeper came in with a hive and talked to the second grade classes. It was AWESOME.


Here are some more color poster boards that I am creating today!

This isn't ten half of my border collection. I don't know how I got so many :-/

That's all for today! PS I just bought Reagan's Candy Awards and I LOVE them. They go perfectly with my classroom theme: CANDY/SWEETS!

Monday, May 14, 2012

Mother's Day and Guided Reading

Good Morning! I'm a bit bummed that I am out sick and only have 14 and a half days left with my sweet students! I'm going to cry and I've already accepted it. The bright side is I will see them next year when they are off in third grade.

On Mother's Day I went into school and made sub plans. Ladies and the occasional gentleman I am on a zpack (you know the medicine that wipes out your cold) well apparently my body doesn't like to respond :( The funny thing is I'm wide awake and as I'm typing this my sub is just NOW getting my kids from the pick up spot. I'm going to go stir crazy sick in bed. I also know I have several autoimmune disease and if I don't rest now I'll be sick for the last three weeks of school. Being responsible can be a bit frustrating at times. 

About Mother's Day . . . Yes I know I am super behind the ball at posting this. Simply remember I am a first year teacher and think back on your first year of teaching. It is a lot of FIRSTS. I decided to have my students complete Deanna Jump's Happy Mother's Day Gift book. My sweets loved it and it was pretty low maintenance to facilitate. Then I started thinking I needed to do more. I went online and googled some homemade scrub recipes. I found one that I tweaked a bit. Vanilla Brown Sugar Scrub ~ it almost sounds like dessert! Some of my boys aced if they could eat it! I kept explaining it was for mom's hands and feet. Anyway, then I bought 1/2 pint Ball mason jars at Publix. I created some cute labels to print out, place on colored card stock, have students write a simple message, sign their name, and then I laminated them. Click on the picture of the jar to go to my TPT store and download the labels for FREE for next year. I printed my labels on sticker paper because the round circles the kids stuck on the lid of their jars. 


Now onto guided reading. Our school does not require guided reading or small groups. I understand why guided reading is the way to go. I completely believe in small group instruction. This year I was not diligent with guided reading. Partly because it is my first year and I'm trying to get an understanding of my curriculum. Partly because my school doesn't require it. Well I started amping it up a bit for the last couple months of school. It is awesome! My sweets love it. I needed a system to stay organized. I really am in "next-year" mode. I created binder covers for almost ALL my binders ~ candy themed of course :)

I purchased this container (19L) from Office Depot. Inside of it I keep a blue, green, red, and yellow file folder. Everything I need for each group is in there color coded file.  So if I'm meeting with my blue group I would get my leveled readers from my blue hanging file folder, I would get out any copies or charts I placed in their and I would be all set.

This is my binder cover. All my binders have this design so they match.

If the spines of my binders are not labels it drives me CRAZY!

I use numbered tab dividers in almost all my binders. I find it simpler that way.  Tab 1 is my Guided Reading Schedule. After the first couple weeks of school I create a "set in stone" schedule to use throughout the year. This allows me to get to know my students and appropriate time frames for them. Tab 2 is my Guided Reading General Info. The reading level correlations, the tips and pointers I find on blogs, some stuff from the Lesson Plan SOS' Reading Binder. Tab 3 is Blue Group. Tab 4 is Green Group. Tab 5 is Red group. Tab 6 is Yellow Group. Each group tab keeps the current lesson plans, running records, informal assessments, and notes. Tab 7 is Guided Reading Lesson Plans. There are several books I'm reading or read and they have lesson plan templates for different reading skills and I'm place them under tab 7. Tab 8 is Helpful Resources aka miscellaneous misfits.

These are my group identifiers. I printed and laminated them. This allows me to have my groups  on display and easily changeable. I only have four students per group. I was thinking of creating some more that had five kids per group and six kids per group. I've read six is really the biggest small group you should have and it can be pushing it. That said I know lots of teachers have large class sizes. 

Green Group

Red Group ~ I also have a yellow group one. I just have three groups this year because I only have 12 students! Yes I know I am SUPER SPOILED.

Well that's all I got for now. I'm thinking of putting all the guided reading stuff up in my TPT store for free. If anyone is interested let me know and I'll put it up. 

Monday, May 7, 2012

Thematic and Classroom Supplies Organization

This picture simply makes me happy ~ candy themed classroom with m&M whole group rug area! Can I just say the beige chair aka "THE Laffy Taffy" chair is a HUGE hit in my classroom. It cracks me up every time :) Side note - stuffed animals appear to be seriously favored by second graders. I need to use them more next year.  
This is where I store my "thematic" units/materials. supplies. I was inspired by the Clutter-Free Classrooms link. Check it out here. I took ideas and used them to create my own idea. I love these plastic tubs from Office Depot. They fit perfectly on top of my IKEA bookshelves. Everything needed for the theme/unit is in the box.  My next organizational project will be my classroom library ~ I'm in the process of making candy-themed labels :) 
Can I simply say I can not express enough how easy these two drawer units have made my life. I'm a big believer in communal supplies. No whining, arguing, and/or complaining that "it's mine" (expressed in student's most whiney spoiled voice). Each drawer holds exactly what the label says. The only stipulation is if it is in a closed container labeled teacher they may NOT touch it. Just about everything is for the kids and I.  Plus side I got the 10 drawer from Office Depot for 10% off because there was a minor defect. By the way, if anyone wants to go and grab one of these they are online only. The one I purchased was an in-store return. 

On top of the 10-drawer unit I keep my box of sharpened pencils and dull pencils.  To the  right of the pencils in the red bookshelf is my pencil sharpener. If you look at the previous picture you can see it. On the three drawer unit, or to the left of the pencils, I keep loose lined paper, plain white paper, and colored construction paper.

I just found this on my desktop. I thought this unit by The Teacher Wife was AWESOME. You can get it HERE. My sweets were so into it. 

I also just found this picture. This is my class' version of "Me On the Map." I purchased the unit from the Clutter-Free Classroom's TPT store. My students were also totally into this. I love that it gives the student a concrete visual of small (me) to large (the world).

That's all folks! Any questions or comments always make me smile. **hint, hint, hint**


Saturday, May 5, 2012

M&M Math and Teacher Appreciation


First ~ I decided to show you how I organize math in my classroom. 
At the end you will read about the 
fabulous teacher appreciation going on!


The math area of my classroom is near my small group table/desk.
All the drawers are clearly labeled with the plethora of math manipulatives
 my sweets and I need access to! For a while I was storing them in the blue
and red wall cabinet and that was just NOT working. If you are going to teach math
hands-on with manipulatives they MUST be accessible to you
 and your students. On a side-note, if you have a sub no where will
 wonder where anything is because it all clearly labeled. 

All the drawers are from Office Depot. There are 2 small drawers and one big drawer
and they are awesome because they don't just slide right out.
 On the other hand, you can simply put pressure on both sides
of the drawer and pot it out. Under the drawers are my math stations.
 I keep my stations numbered. I attach a piece of velcro to each station box
and each M&M number card. It makes stations pretty easy! The white drawer
on the left is our Math File! We use EnVision math. Everyday my sweets get a new math
sheet to work on. When they are done they open this drawer and place
it the labeled file that says "today's completed math sheet." There is also a file
for "corrected math sheets." If a student had errors that needed to be corrected
on their math sheet they correct it and return it into the corrected file.
I also have files that are labeled for the current math stations.
This makes identifying and assessing completed math station work very simple.
I put a class list in every file. Once a student has complete and turned in a
particular math station recording sheet they place it in the labeled folder and
highlight there name. Second graders LOVE to highlight! The white drawer on
the right is for our connecting cubes. I have a lot and use them all the time.
My one stipulation is put all colors back in the appropriate
 collared bag.  The red bin from IKEA (which I love) is for our math books. I love
children's literature! I think it is so important to integrate literature in math.
Over the summer I plan on creating math literature units to
 go along with every topic I teach in enVision math!  


This picture is a little blurry. The drawers closest to the right are awesome!
They are for lost and found game pieces,  skinny expo markers and small dry
erasers, erasers (any and all), dice (all kinds, if they are not your
 average number dice they have their own labeled ziploc inside
 the drawer), spinners and timers (for stations), and counters and game
 pieces (just like the dice, they all have their own little baggy to keep
them in order). Now how do my sweets keep up an organized classroom?
Explicit modeling and PRACTICE.  So that is what math looks like
in my room. Next week I will post on how I organize my "guided" math groups!

How do you organize math in your room?


Second ~ I'm already setting aside time tomorrow to do some
SERIOUS TPT shopping. They are offering 10% off and just
about every other TPT seller is offering an additional 20% off.
I will also be putting my TPT store on sale! 
Check It Out HERE!

For the record I have added several new products to my store.
 My class will be doing a bee week starting next week
 and I created a unit for us to use!


The Buzz On Bees ~ Check it out HERE!
I also uploaded to my TPT store *some* of the candy themed labels 
I have created to organize my classroom after several people suggested it. 
I had toyed around with the idea and there suggestions encouraged me to do it.
 Quite honestly I looked around for such things on TPT and couldn't find anything.  

By the way I'm trying to figure out how to add the reply to
 comment function on my blog. If anyone knows how to 
please let me know!  All that is to say I love reading 
your comments ~ it makes me do a happy dance. 
I also like responding but want he reply thingy to make it more personal!


Thursday, May 3, 2012

Organization Classroom Tour ~ May's Currently

     Well. . .  I will start out admitting that I have been MIA. I truly do LOVE reading all the awesome blogs out there. I read them everyday ~ it's my downtime, my inspiration, my encouragement. . . That said I also "plan" on being more consistent. I will say that my first year of teaching is almost over and my first bit of advice to ANY firs tear teacher is to just accept that the first year will be hard NO MATTER what you think!!!! (how's that for a long sentence)

May's Currently:
I LOVE that Farley from Oh' Boy Fourth Grade does this ~ it always pushes me out of my shell. The whole pageant title pushed me out of my shyness (my boyfriend helped me out . . . hopefully that's alright). 

     While I've been MIA I've been reevaluating how I function as a teacher. I realized that being ORGANIZED is essential and started working on my from to make manipulatives and resources more available to my students and myself. One of my ABSOLUTE favorite things to read on blogs is classroom setup / classroom organization. I LOVE IT! Without further ado this is my home away from home. I will be posting the rest of my classroom in the next several days.

I have two entrances to my classroom. One is on the left and the other on the right. This is the view you see when you walk in through the left entrance door. My crate seats were made by my grandpa and are in excellent condition after a year of second grade fun. I use my guided reading table for small group work and as my desk. My rule of thumb is that it has nothing on it at the beginning or at the end of the day. The blanket is a Dots candy blanket. My classroom is candy/primary colors themed. I am always cold so it comes in HANDY. 
This is another view. There is a linky I read about that was going around called "The Good, The Bad, The Ugly" (or something to that effect. That corner next to the filing cabinet is what I consider to be my "ugly" ~ mostly because I haven't quite decided what I want to do with the red bookcase. I amy move it to a different area of the classroom or give it away. One thing I've noticed is that teachers (or most of them) rarely can let things go. I want to be practical about what I keep in my classroom. I mean it is a classroom and is supposed to be a learning rich environment. I've gotten rid of several things and have been questioned on some of those decisions ~ but I still love the decisions I made. One of those things was my "traditional" teacher desk. Below you will see some of the things that allowed me to be completely fine (actually thrilled) to get rid of my desk).

another angle

Behind my small group table I have "book bins" for all the subjects I teach. They are labeled and they hold the current teaching manual, related papers, textbooks, and anything else I will use often while teaching that subject. It has been one of my favorite organizational tricks. 
In the subject bins I also keep a notebooks or such that I am modeling to my students and doing with them.


I saw this idea floating around Pinterest and decided I was going to make one. This thing was about $12 from Home Depot. I used avery full page labels (plain sticker sheets) to print my candy themed labels onto. If anyone would be interested I'm happy to share :) It took my a couple times to get the perfect size but I did! To purchase these labels go HERE!

These are my favorite drawers. I will only by them from Office Depot. They are awesome. Why you ask? They don't slide right out, yet if you push in both sides they come out nice and easy. I use a ton of these in my classroom. The blank yellow one needed a label but I hand;t quite decided what I wanted it to say yet. When I do I will simply go and type it up. The reason for the line is in case I just want to write it in Sharpie till I have time or REMEMBER to print it out. People I forget WAY to many things for an individual of my age. I'm a young teacher ~ I mean youngest faculty member, people always say I look to young. . . you get the picture.

This is the bookshelf I'm not in love with but I do love it is clutter free. Above the desk is my Mon-Fri drawers ~ love those. I also have an "extras" drawer. This is for those times I need a time filling worksheet, hidden picture fun sheet, quick craftivities, and things like that. I also have it in my mind as a back-up plan for a sub who has to much "extra" time. 


In the desk to the left I keep my to be graded system. You can read about that HERE. On the right side of the desk is my copy folder an basket. I will add a picture of my folder (I think it is so fun). I keep what needs to be copied in the folder o the left side. Once it is copied, it moves to the right side to be filed back in the correct place. The copies made to use are put in the basket. Once I get back to my room they get placed in their appropriate places. Except for the white stack you see that I didn't move due to being late to pick my kids up from Specials (or at least thats what I think).  Underneath the desk I have this awesome six drawer organizer that I use every single day. The labels tell it all.

I hope you have enjoyed the tour so far. I would love to hear of  any thought you all have. I love organization. I believe an organized classroom make the teacher more efficient. In turn the teacher has more time to focus on academic instruction.