Monday, December 3, 2012

Easy & Cheap Test Folders DIY


Okay sooooooo this post is long over due! I use these these items every single day. Every SINGLE day I use them I think hmmm I really need to find the pictures I took while I was making these and share with all the other teachers out there who dont want to spend crazy money on test folders. I know I spend way to much money for classroom items/tools/materials. So if anyone is willing to spend the bucks I feel as thigh I would be one of them.  Well during Targets crazy school deals that came out waaaaaay to early in the summer I saw tons of folders. Now of course since the folders were so cheap, like fifteen cents, I had to snatch them up. Then I was meandering through all of Target and came upon all the fun and fancy duck tape! I thought I bet I can tape two folders together with fun duck tape and then laminate them.  TADA!! Cheap oh so super practical test folders. I use mine everyday and they are still I perfect condition. Obviously such a long introduction is only worthwhile if the item is valuable. You will be so thankful for these.  No more "I don't have any empty folders!"

Step-by-Step DIY Test Folders

Step 1
Select an even amount of folders.  I like to match so I bought an equal number of folders that were all the same color.

Step 2
Select two folders.


Step 3
Open one of the folders with the pocket facing you.


Step 4
When facing the open folder take your chosen duck tape and place half of the decorated side of the duct tape strip onto the right side of the open folder.


Step 5
Then shut the folder with the adhesive side of the duck tape looking up at you.


Step 6

Then open the other folder with the pockets facing down. (remember to make sure thickets are opening the same way as the already taped folder) Align the folder to match up with the folder already taped and press it down onto the exposed tape.


Step 7
Then continue to roll the tape onto the spot where the two folders are joined together.


Step 8
Cut off the tape roll with approximately a 2 inch overhang. Fold the tape over onto the pocket side of the folder.


Step 9
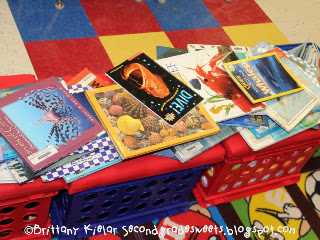
Flatten out the "test folders" and laminate them.


Step 10
Once the folders are laminated, cut them out of the lamination and fold them on there original creases. I folded them and placed a couple big books on them. The you are easy to use them!

~~~~~~~~~~~~~~~~~~~~~

I've also been busy making these Old Lady activities!


Check it out HERE!

Check it out HERE!
This goes along perfectly with this book:
There Was an Old Lady Who Swallowed a Bell!

Check it out HERE!
Check it out HERE!
This goes along perfectly with this book:

I Know an Old Lady Who Swallowed a Pie (Picture Puffins)

Monday, September 24, 2012

Volunteers are WONDROUS!

Can I just say I am thrilled by all the wonderful volunteers I have in my class this year. It's wonderful to see students' families engaged in the classroom AND it is such a help. Some family members volunteer during the day and com ein during math time. This lets me have another adult in the classroom working with students when I am conducting math small groups. I LOVE this time ~ SOOOO beneficial. I also have several families that will cut lamination or prep activities at their home and send them back in. When I send things home to volunteers I have a little system to keep it all organized. I thought I would share it with you all. . . 

The paper I send home in the big baggy explaining what needs to be done. 


The small baggy with examples of how I want things cut. 

The final product before it gets sent home. 
You want to know what is AWESOME about this. All the families brought the bags back to me in less than a week (most brought it back the next day!!!). 

Now how I organize my Copy volunteer system. First off, I keep it all in a copy folder that says COPY ~ Miss Kielar (PICTURE to come). Then I simply paperclip one of the squares from the following form on to each item or set of papers I need copied. I can put the total amount I need copied. I check if I want it 1 sided to 2 sided, 2 sided to 2 sided, 2 sided to 2 sheets, or leave it blank if I just want it normal. Next, I can say to paperclip or staple. I also have a spot for sorting papers or stacking papers. I enjoy colored paper and card stock paper at times so there is a spot for that as well. I love this system. It is so simple to manage. 

There are 6 slips to a paper. 
Here is a close up!
You can grab these forms as FREEBIES at my TPT store HERE!

Sunday, September 23, 2012

Frames, Oceans, and Vertebrates


The week before school started ((((way back in August)))) I created one of the "First Day" frames. Of course the only willing models I had were my puppies! How cute! On the first day of school I had each one of my sweets stand in front of my (then blank) blue bulletin board and hold the frame. There were some SUPER adorable pictures. I will definitely be tweaking the frame for the 100th day and the last day of school. Then I will take all the photos and give them to the parents as a memory keepsake!
What's hilarious is Dasher was AFRAID of the frame. How funny is that?
This is my baby Wesley! He wasn't afraid one bit. It's true small dogs think they are bigger than they truly are. 
Puppy Love
This is what each students desk looked like on the first day of school. I created a little "goodie" bag for each sweet.  The label on the polka dot treat bag says: "I'm bursting with excitement to have a smarty like you in my class!" I put starbursts,  smarties, pen/pencil, and notepad in the goody bags for my sweets. They LOVED them. I do have the labels and was trying to find them to add as a freebie. I will find it before next year rolls around :)
My mom came to my class the 3rd day of school with my back-to-school basket. Growing up she always made each of  her kids a back-to-school basket. . . and well I'm still in school so I still get one!
My mother then took a picture of me with each of my sweets holding the red m&m chilling in the basket! That blue bulletin board was our back drop!

We just wrapped up our Oceans unit in science. It was so much fun. Our reading story was Dear Mr. Blueberry. For those of you who don't know, the story is an informational story. A little girl is writing letters to her teacher, Mr. Blueberry,  asking questions about the blue whale living in her pond. It is super cute and ties in perfectly with our Oceans unit. To kick it all off we watched a video from United Streaming about the blue whale. We filled out an adjective map about the blue whale. I used the one from Deanna Jump's Ocean unit (which is awesome!)  I also created a Whale Research Notes (it's available as a FREEBIE at my TPT store) book for each of my sweets to complete.
 I went to our school library and checked out every book we had on whales. I brought all the books to my classroom meeting area. Here are some of the ones I checked out: 


Here is an example of some their Whale Research Notes:


I went over my expectations for using the library books to help them complete their Whale Research Notes project booklet. My sweets did an AMAZING job with the project and they completed it INDEPENDENTLY!!! (YES that's a huge accomplishment) Then we began reading our science book and matching up vocabulary words. I used United Streaming to watch the Magic School Bus: Takes a Dive video. WOW between that and the blue whale information we had already learned they were hooked on the Ocean unit. For our science curriculum the kids have to know what an island, trench, continental shelf, undersea mountain, bottom-dweller, free-swimmer, and a floater all are and where they are in the ocean. I split my class into 4 groups and gave them all those labels and four colors of bulletin board paper and said make your own ocean! At first they were unsure of how to do it. They wanted me to give them step-by-step instructions. After I continued to encourage them to keep it up and create their own ocean they became absorbed in it! Here is an a peak at one group's work:

That's how I do oceans and I'm looking forward to adding even more things to our unit for next year. It's all about tweaking what you have and improving with experience.

In science we are off in the land of vertebrates starting on Monday! I just finished a mini science unit to help us with our learning. 

It's posted at my TPT store HERE. I would love to know how you teach vertebrates, cold-blooded and warm-blooded animals, and amphibians, mammals, and reptiles????!!!

I will email the first person who comments (with their email address) my new unit!

Monday, September 3, 2012

Currently Link-Up!

I believe I'm able to enter the blogging world again! I've missed it, but time has not been on my side. Tomorrow is Back to School Night. I created a powerpoint, handout, class blog letter, and volunteer sign up. Lord willing I'm prepared as much as I need to be!

Now onto September's Currently. . .

I have pictures coming soon from Busch Gardens. I went there this weekend and it was a blast! I only went on one ride and loved my time there. More on that later this week. Go link up with Farley and don't forget the Rule of 3! Come on now, we are teachers who tell our kiddos to follow the rules :)

Saturday, August 11, 2012

TPT Back to School Sale!!!!

Cute graphic courtesy of Amy Lemons!


I'm dropping in to let you know that my entire TPT store is 20% off Aug. 12-13 (TPT is offering an additional 10% off but you MUST use the coupon code: Bts12).

Check out my TPT store HERE! I must say my TPT wish list is crazy long and this sale gives me a reasonable excuse to shorten it up a bit! ;)

As soon as I have time to write a real blog post reflecting on how I set up/prepare for back to school I'll be posting (most likely quite a bit). I've been working on getting ready for back to school a fair amount.


Saturday, July 28, 2012

Full of Excuses: Vocabulary and Spelling Words

YES! I'm full of excuses about not blogging consistently (family, health, classroom, family). I promised myself that blogging would be a reflection of my teaching practices and a journal of my teaching experience. Of course it is also a huge learning experience. I L.O.V.E. it. I especially love it because what I'm about to show you will truly be appreciated only by teachers. Everyone else close to me humors my classroom talk but they don't really get it. 


I've been working on redoing my bulletin boards and maximizing my wall spaced for student learning and student made learning products. 
This board is to the left of my whiteboard. On the right of my white board is the exact same bulletin board. I transformed the "right" one today!

This is my finished product! This wall is for our vocabulary words and spelling words. The blank red paper is an example of what will hang from the "clothesline." Usually all our anchor charts, vocabulary illustrations/definitions etc are created on the size paper. The red pocket chart is for our weekly spelling words. There is one word in their (the rest were in a container so I left them there for now :) The blue pocket chart is for our vocabulary words and task cards etc. In between the red and blue pocket chart are spaces for spelling anchor charts. If I choose to use 8.5" x 11" paper I can hang two, OR I can use the red paper size (I'm having a brain freeze on the size) from the top string under "words."
II had been creating this board in my mind and wondering if it would really come together. It is SO much better than I thought it would be. I love the ease of the paper clips. I love how clean it looks. It is nice and uncluttered. The titles are simply white and pop in my opinion. 

I placed six red clothespins on each of these ribbons. When I attached the ribben I made sure it was very taut. I also tucked the ribbons beginning and end under the bulletin board border.  I also stapled the middle fo the ribbon to the board to help avoid any drooping! What's also great about the clothespins is the ability to move them. I love the flexibility they afford me. 

Sorry it's a tad blurry ~ I'm still just loving the way the white title pops! 

I have been working in my classroom this week. I plan on having my entire room first day ready by Friday of next week. That includes LPs and copies :) I'm determined.
That's all for tonight! This week I plan on posting how I plan on using a writer's binder in my classroom and my writing station. There will be a couple freebies involved!!

Saturday, July 21, 2012

I'm BACK! Candy Themed Labels

This post is long over due! I have soooo many things to blog about: Debbie Diller's Summer Institute, new class layout, all the features of my room, Debbie Diller's Summer Institute (yes it was awesome), my back to school purchases, and a couple other things up my sleeve!


I've had several followers ask about the classroom labels they see in my classroom.  I just uploaded all of them up onto my TPT store! The BEST part is that ALL the labels are also provided blank.


Here is the preview file :)

Check It Out!

Check It Out!

Check It Out!

Check It Out!
 You can see the labels in use in my classroom in the following pictures:


That's all for now! I'm in Georgia for some vacation so its brief and short tonight :)